Tuesday, June 17, 2014

Likeable links

I thought that it might be fun to share some favorite links today, just to share some things I have been liking/considering/mulling/coveting lately. Please note that these are just some things I have found recently that I wanted to pass along-- I receive no compensation for sharing them and am not affiliated with any of these companies.

First is this adorable teacup, from OlisCupboard on Etsy. All of her ceramics are really clever, but I am especially drawn to this one. I actually drink my coffee every morning out of a teacup, and the idea of waking up to this beauty every morning is quite appealing.


Next up is this mug with a little dissertation motivation printed on the front! I love the message and I really like the mix of fonts. This mug is from Click and Blossom, and their site has all kinds of similarly whimsical items for sale, like tee shirts, totes, and onesies.


After reading this NYT article on G&B Coffee in Los Angeles, I am sorry I don't live closer to the Golden State! Everything in the article sounds amazing, from an espresso milkshake to a macadamia-almond iced latte. Love that they only make things they would really want to order. The article includes a link for making the macadamia-almond milk, so I may need to try this one on my own!


I know it's summer and winter knits are the last thing most of us are thinking about, but knitting those booties got me thinking about another quick knitting project and it might be this Rikke Hat from Happy Knits. I love the simple, slouchy shape and I have some hand-dyed yarn that I think would be perfect for it.


Finally, this peach sherbet from Martha Stewart Living looks so good and so easy I may give it a try this week. The ingredients are just peaches and sweetened condensed milk. Better still, no ice cream maker is required! I will probably need to make a partial batch since Jared is not a fan of peaches, but luckily the recipe is so simple I don't foresee that being an issue.


Friday, June 13, 2014

Tiny shoes for tiny feet


 Let me tell you, it has been a long time since I completed a knitting project. It's not that years go by without knitting a stitch-- like any good knitter, I have some unfinished pieces that I pick up occasionally before abandoning them again, sometimes after knitting just one row. I have made a couple of simple berets during grad school, which I have used often in the winter (it's a revelation to live in a place where lace knits aren't out of the question in cold weather). Sadly, those berets were both knit pre-thesis, so it has been a few years since I really finished a project.

Above you can see what I knit up last week, start to finish! Yes, they are very, very small and the pattern was very simple, but it felt really good to knit something up and I had forgotten how nice it is to knit on a long road trip or in the evenings after the day is done. I think I need to bring knitting back in to my routine. There's something about the clacking of the needles, watching the fabric grown... it's almost meditative, and I have missed that. I also really miss my knitting group back home; I think wherever I end up next, I need to make joining a knitting group a priority.

I returned to knitting because a dear friend is having her first baby and I think that a handmade gift is nice when someone reaches a life milestone like this. Of course, I got her some practical things, too, but I like to think her baby will wear these little booties for a bit and then they will be stored away as a memento from this special time. Obviously, the yarn is easy to care for so when they are in use she can just toss them in the wash with the rest of the laundry.


Here's a close-up on the stitches, after I blocked the booties. For non-knitters, that just means I washed them gently by hand and when they were still quite damp I shaped them into a nice boot shape. Once blocked, the stitches look more even and the finished product looks more like a bootie and less like an oddly shaped sock.

....cables! I just love cables, which is why I chose this pattern in the first place. The booties are also super simple to knit. You knit them up flat, increasing to shape the bootie, then working the cabled portion before finally adding eyelets and knitting up the cuff. It doesn't look like it, but the cuff is actually the portion that took me the longest. If you're like me and love a project with some variety, these are great because they have a lot of different techniques but you only work on any one portion of the bootie for a few rows, so the project moves quickly. The booties are finished off with a tie; for these, I used a simple crochet chain, but you can also use i-cord or ribbon. Personally, I like having the tie done in the yarn, but a simple grosgrain ribbon could be nice, too. Either way, it's a cute little project and is just the thing when you want to a little something special to celebrate a new baby.

Project Details

Pattern: Two Needle Cable Baby Booties by Barbara Breiter
Yarn: Filtura Di Crosa Dolce Amore in color 48 (it's like a lime green, see the picture on Ravelry)
Needles: Brittany size 7 double pointed needles (DPNs), plus one medium cable from the Brittany cable needle pack

Please note that DPNs are totally unnecessary for this project; I just couldn't find my smaller needles when I wanted to start knitting and they seemed like a good substitute. I usually go up one or two needle sizes because I knit a bit tighter than some, but you know your knitting best so choose the needles that are right for you.

Thursday, June 5, 2014

An inspired improvisation

In the summer, I often have a smoothie for lunch. I usually try to get some exercise in right before lunch, so it's nice to have something light and cool afterwards. My approach to smoothies is usually "kitchen sink": throw in whatever fruit I have around, yogurt I have on hand, maybe some herbs, maybe some juice, often a handful of spinach, and some ice cubes. Nothing fancy, and although often good, rarely something to write home about. Yesterday's smoothie was one of those happy accidents that was so good, I recreated it today and decided to share it with you.

This smoothie is just yogurt, mango, blackberries, blueberries, and spinach. I promise, you won't taste the spinach (for anyone out there saying, "Spinach in a smoothie?! Yuck!", as my husband did). It has a nice, prominent berry flavor with some of the acidity from the mango, which just really hits the right note as the weather is heating up down here.

Ready... set... go!

 Place six ounces or so of vanilla yogurt in your blender along with half of a ripe mango, chopped (or just pealed and pitted).

Add three ounces of fresh blackberries...
 
...a quarter cup of frozen blueberries...

....one cup of baby spinach...
 

...and 3-4 ice cubes.

Whirr in your blender until smooth. I like to start on low and slowly move my way up to the higher settings, but you know your blender best.
 

Viola! A light, summery smoothie full of all kinds of good stuff. Again, this is usually something I just throw together, so there's no need to follow the directions exactly as the flavors are just provided here for inspiration. You can always exchange fresh for frozen fruit (and vice versa), although you'll want to adjust the ice such that you use more ice when you have more fresh fruit. If your smoothie seems a little thick, it's probably a bit too icy. This can be remedied with a little juice or milk, or even some extra fresh fruit. Some people thin smoothies with water, but I find this makes them taste, well, watery.

One note about spinach in a smoothie: if you're particular about smoothie color, pair fruits with spinach cautiously. I have found that if I stick to yellow (peach, mango, pineapple, etc.) and green (kiwi) fruits, the smoothie has a very pretty green color. If you use a fair amount of purple fruits (blueberries, blackberries, etc.), the smoothie is a nice purple as the berry pigment seems to largely mask the color of the spinach. The danger zone for color and spinach smoothies is red. As we know from the color wheel, red and green are complimentary colors, which means they really set each other off when paired in design. However, when the pigments are mixed, complimentary colors produce muddy, brown/gray tones. For this reason, if you want a smoothie that looks as good as it tastes, use red fruit (strawberries, raspberries, etc.) sparingly when making a smoothie with spinach.

Tuesday, June 3, 2014

Summer reading

 
 I thought it might be fun to post a bit on summer reading, the dream of vacationers and grad students alike. Every year, I amass a pile of books for reading over breaks. I add and add to the pile, decide it has gotten too large to be manageable and then whittle it down again. Repeat.

Above you see my current pile, although I admit that I already read A Year in Provence, and it was lovely. I found it in a thrift store on the Delmarva peninsula on a weekend getaway and when I saw Julia Child's endorsement on the back (simply, "I really loved this book."), I knew I had to have it. It did not disappoint, as I found it to be funny, informative, and full of daydream material. Highly recommended by me (and Julia Child). The Pynchon novel is one of my husband's favorites, and he has been needling me to try a Pynchon novel for a while. Jared introduced me to a few wonderful books over the years, including A Farewell to Arms, so I trust his judgment. We made a deal that while I read through it he will reread it so that we can discuss it together. I'm sorry to say he is getting through it much more quickly than I am. The other novels are just some I have been hoping to read for a while. Only time will tell which remain in my reading pile and are actually read this summer.

The last book is dissertation guidance/inspiration/motivation, which I'm reading section by section as I work. The method of outlining and breaking the work into manageable chunks is really helpful, I think. Also, if you want to get through the end of your graduate school work asap, this is the book for you; anyone who wants to meander through the dissertation will be disappointed in the emphasis on choosing projects and methods that move as quickly as possible. However, for those of us who are itching to get on with it, the focus on speed is welcome and needed.


Finally, it seemed funny to contrast my summer reading with my pile of books from the semester. Mind you, I renewed all of those library books through the fall so they aren't leaving my life. I am going to enjoy turning to them a bit less and turning to novels a bit more, however.

Hope the summer is bringing you a vacation or two and some extracurricular readings, as well!

Thursday, May 29, 2014

So this is it....


I admit I have not posted in forever. But in my defense, I have done so much.... so much grad school, that is. I have *finally* reached that miraculous place known as ABD (all but dissertation) that means so much to a grad student and absolutely nothing to anyone else.

But, but! Classes are done, exams are done, and my advisor has greenlit but proposal outline, so that's a big deal. And my husband is job-hunting, since his grad schooling is actually done, so that's a really big deal.

My head is full of the things I want to do in the coming weeks/months/years. I spoke to someone recently, who had asked about how my program was coming along, and he related to me that he had so many fond memories of the dissertation stage because your whole life is ahead of you and you have so many dreams as you near the end of grad school. At first, I was struck by the fact that generally I get sympathetic smiles or dissertation horror stories, so his warmth was a shock. However, the more I consider it, the more I think he may be right. This probably says a lot more about me than anything else, but I have always been a bit of a daydreamer, and as a result I do consider the best times in my life to be those full of hope and promise, before the dreams have fully come to fruition.

Few extracurricular projects have been completed, and very few have been photographed for posterity as of late. I did get out my sewing machine, lovingly sweep out the dust bunnies, and get all of her moving parts cleaned up. I even made a very small alteration on my bathing suit cover-up, so that's a step in the right direction. Said alteration was performed in preparation for a conference in the most beautiful conference location I have ever seen...


...Honolulu (okay, that photo is from the North Shore of Oahu). The first four days of my trip were spent in windowless rooms listening to (fascinating) academic talks, but we did stay a few extra days to see the sights. Perhaps more on that later. Until next time, I will be trying, trying, trying to focus on my dissertation draft so I can move on to bigger and better things! And making some time to indulge my domestic hobbies, too.


Friday, July 27, 2012

Still breathing.


Okay, okay, I planned an update much sooner than this. So very much has happened, and I'm happy to say a lot of really great things have developed. First and foremost, I finished my Master's thesis and officially graduated! Hooray!

I cannot describe in words how amazing it feels to have the thesis monkey off of my back. Although the project will continue following some lessons learned along the way, it feels amazing to know that I have something tangible from my efforts and that I could go out there and get a job. I will be continuing on in the PhD program, so I will not be seeking employment for another two years... but at least I know call center work is no longer in my future.

Why did it take so long again? Oh yeah, it weighs 2 lbs 10 oz (that's over 140 pages)!


I also had the opportunity to teach my very own course this summer, which was a great experience. In my field, a bit more than half of us work "in the field" and the rest remain within academia. I have not decided for sure which way I will go, but teaching a course gave me a good dose of what to expect as an academic. We also had some restructuring in the lab and some really exciting new projects have come my way post-thesis.

Of course, all work and no play makes Jill a dull girl and you can be sure I have been cooking, baking, thrift store-scouring, reading, etc. these last few months, too! Why haven't I shared these adventures with you? Well, back in March our camera decided that from here on out, it would only take pictures like this:


Which would be amazing if I kept a surreal horror  blog. We tried a few things to get it working again, but the long and short of it is our camera bit the dust. Unfortunately, our grad student budget doesn't really allow for a new camera and after some unexpected expenses popped up (as they always do, at the worst possible time) a camera just wasn't in the cards in the foreseeable future. I frowned, but decided to be patient... like maybe-after-Christmas-patient.

Then recently, I realized I still had my old camera from college. It is clunky, only holds 32 photos, uses regular batteries, has been around for nearly a decade, and is devoid of most bells and whistles. But it works!

In celebration, I am giving you the culinary equivalent of a sigh of relief. This is comfort food, yes, but the kind you can whip up then stash in the fridge or the freezer to give you a little pick-me-up for many dreary or draining days to come. I am talking about classic American brownies.


These brownies are wonderful the way they are-- fudgy with a crinkly top and full of rich, chocolate flavor, just the way my husband likes them. However, they are also a great base for adding nuts and chocolate bits to add plenty of interest and texture, just the way I like my brownies. 

 Classic Brownies

Adapted from Cook's Illustrated, March & April 2004

Makes 24 two-inch square brownies

Note:At the end of step 3, feel free to fold in 1 cup of chopped, toasted walnuts and/or 1 cup of chocolate chips, dusted lightly with flour (if you skip the flour dusting, the chips will sink). Also, be sure to really test the brownies. Mine required about 45 minutes until I had just a few moist crumbs on my tester, but do start checking early and really make sure just a few crumbs cling! The goal is fudgy, not gummy or cakey.

1 1/4 cups (5 oz) cake flour
1/2 teaspoon table salt
3/4 teaspoon baking powder
6 oz unsweetened chocolate, finely chopped (use the good stuff here, I like Valrhona)
12 tablespoons (1 1/2 sticks) unsalted butter, cut into 6 pieces
2 1/4 cups (15 3/4 oz) sugar
4 large eggs
1 tablespoon vanilla extract

1.Preheat the oven to 325 degrees and place a rack in the middle position. Line a 9"x13" baking dish like so: cut an 18" piece of foil, fold lengthwise to 8" width and fit it into the length of the pan; cut a 14" length of foil and fit it into the with of the pan, perpendicular to the first sheet. Be sure to press the foil down into the corners and spray the pan with nonstick spray. This is your insurance against sticking, so don't skip this step! You'll be glad you did it when it's time to cut the brownies.

2. In a medium bowl, whisk together the flour, salt, and baking powder. Set aside.

3.Set a large, heatproof bowl over a pan of just barely simmering water. Melt the chocolate and butter together in the bowl, stirring occasionally until it is completely smooth. Remove the bowl from the pan and slowly whisk in the sugar. Add the eggs one at a time, whisking thoroughly after each addition. Whisk in the vanilla. In three additions, fold in the flour mixture until the batter is completely smooth (i.e. no little pockets or lumps of flour).

4. Pour the batter into the prepared pan, spreading the batter into the corners and smoothing the top with a spatula. Bake until a toothpick inserted into the center has just a few moist crumbs attached, rotating the pan halfway through, 35-45 minutes. Start checking at 30 minutes to be sure you do not overbake the brownies. Cool on a wire rack for 2 hours (about room temperature). Once cooled, lift the brownies out of the pan using the foil overhang. Cut the brownies into two-inch squares and serve (alternately, keep them in the fridge for about a week or the freezer up to 3 months).

Be warned: they are extra delicious with a cup of strong coffee. I've had this french press for a few years, courtesy of my father-in-law who knows I love a good cup of coffee, but only taught myself how to use it recently. If you have one languishing in your closet, I highly encourage you to dig it out and give it a try-- it makes a perfect coffee break for one on a hectic afternoon.


Wednesday, March 28, 2012

Moving on up.


I can't believe it. On Tuesday, I had my thesis defense. The night before, I made Jared watch me practice and be my stand-in audience. I made blueberry muffins to bring my committee. I hardly slept I was so full of excitement, terror, anxiety, happiness, fear...

I presented my findings over a 30-minute Powerpoint presentation, to my committee members and my lone audience member (Jared). They asked me questions, some I was prepared for and some I was not, before asking me and the audience to step outside so they could deliberate. We stood in the hall and although I was less nervous than I thought I would be, I was not sure how the whole thing went, but I was so grateful to have his company so I didn't just worry the minutes away.

After 5 or 10 minutes, my advisor came out and shook my hand. It was so surreal. As I realized what was happening, I felt weak in the knees. I had passed the defense and officially obtained my Masters degree. The other members congratulated me and they and Jared left the room. My advisor and I spoke about the new projects I would be started and I'm just so excited for the road ahead. New projects, a new degree, a new chapter.

No recipes or projects today, crunch time to turn in my thesis (with revisions) to the university, but look forward to new exciting things soon!

Thursday, March 22, 2012

A cure for coconut haters.


Okay I'm not a coconut hater and I can't claim to understand the aversion. But, as every coconut-loving baker knows, there are plenty of people who cannot stand the stuff. The most common complaints I hear are about the texture-- something about the texture of your standard sweetened dried coconut is just off-putting to some.

I'm not generally in the business of turning distaste to adoration. However, these cookies more than anything else I've made seem to hold some magic power over people who loathe coconut. I warn them, "Those have coconut in them! I know how much you hate coconut..." but over and over they insist on just "a little bit" before exclaiming that they have never liked coconut but they love these cookies. That is some pretty powerful stuff.

I would love to tell you that there's some new technique used in these cookies that will make your boyfriend who hates mushrooms crave them, or make your kids beg for spinach. Unfortunately, I think it all goes back to that texture issue-- in this recipe, the coconut is finely ground before mixing it with the dry ingredients. Which, when I consider it, could help those who dislike the texture of mushrooms, although I can't claim to have a special mushroom cookie recipe in my arsenal.


Coconut Sugar Cookies

Adapted from Martha Stewart Living, December 2005

Makes 5 dozen, depending on the size of your cutters

Note: To me, these are Christmas cookies as I make them every year (except last year, which lead to some sad faces... I'm telling you, people love these cookies). But I have a friend who requests them every year for her birthday and this has caught on leading me to make them all year round. Which is nice, if you have cookie cutters that are not almost exclusively Christmas-themed (which I do not). They also make the cutest Valentine's Day cookies if you color the icing like conversation hearts (bonus: no chalky taste). Finally, feel free to freeze the raw dough for later use, wrapped carefully, for up to a month. Just thaw, roll, cut, and bake.

7 oz sweetened flaked coconut
3 3/4 cups all-purpose flour, plus extra for work surface
1 1/2 teaspoons baking powder
1/2 teaspoon salt (standard table salt)
1 cup (2 sticks) unsalted butter, softened
1 1/2 cups sugar
2 large eggs
1 1/2 teaspoons vanilla extract
Coconut glaze (below)

1. In a food processor, process the coconut until finely ground-- it should look kind of like coarse sand. In a large bowl, whisk togather the together flour, coconut, baking powder, and salt; set aside.

2. In an electric mixer fitted with the paddle attachment, mix the butter and sugar on medium-high until light and fluffy, 3-5 minutes. With the mixer on low, mix in the eggs, one at a time, followed by the vanilla. Add the flour mixture and mix until just combined, scraping down the bowl as needed. Divide dough into thirds and wrap each piece in plastic. Refrigerate dough until firm but malleable, about 1 1/2 hours-- you'll know it's ready when your finger makes a dent with some resistance, if it's too hard, let it sit out for a few minutes before rolling.

3. Roll out dough between 2 sheets of parchment paper to 1/4 inch thick. Repeat with remaining dough, stacking between parchment on a baking sheet. Freeze or refrigerate until firm, 30 minutes. **Really important, don't skimp!

4. Preheat the oven to 350 degrees. Cut out desired shapes with a cutter. Place on parchment paper covered cookie sheets, 1 1/2 inches apart. To ensure that your shapes are really crisp, chill the cut cookies again for 15 minutes before baking.

5. Bake until edges are just golden, 11 to 13 minutes, rotating sheets halfway through. Let the cookies cool on sheets 3 minutes before transferring to wire racks to cool completely. When cookies are cool, spread a thin, even layer of glaze on each cookie. I prefer to use a small spoon, but a piping bag works, too. If you like, toss some colored sugar or sprinkles on while the glaze is still wet.

Extra note: These cookies are really best if you leave them sit overnight after glazing them on wire racks. After a few hours, the glaze melds with the cookie and they become more tender and somehow tastier. Also, the glaze never fully dries, so if you want to pack them for longer storage (and you should) layer them between sheets of parchment paper so you don't end up with one giant block of cookie and glaze.


Coconut Glaze

1/2 cup unsweetened coconut milk (if you have extra, just freeze it)
6 cups, give or take, confectioners' sugar
Food coloring (optional)

Whisk together coconut milk and sugar in a large bowl until it is as thick as honey-- if it's too thin, it's really hard to spread. If it's too thin, add more sugar, if it's too thick, add just a touch more coconut milk. But be patient before deciding to tweak it-- really whisk it in as the coconut milk can take a surprising amount of sugar. Tint with food coloring, if desired, I like just a few drops of gel-paste food coloring. Spread on cookies immediately; it gets a hardened skin if left to sit.

Monday, March 19, 2012

So much to look forward to...

No recipes or projects today... just wanted to drop in and say that my thesis defense is finally scheduled and I finally feel some relief that things are moving forward! Following the defense I have a laundry list of projects I'd like to get started both personally and professionally (not to mention a celebratory dinner, courtesy of my husband).

So, plenty to get excited about! Hope your week is off to a great start!

Saturday, March 17, 2012

A little something Irish(ish)


That is a delicious, personal-sized soda bread. No, it's not 100% authentic Irish soda bread. Then again, despite my new Irish last name, I'm really authentically Irish, either. But since it's my first year with anything linking me to Éire, I wanted to do something a little special for St. Patrick's day.

Traditionally, soda bread does not contain eggs. It also doesn't traditionally come in cute little individual loaves nor does it come with dried sour cherries. However, I love food sized for just one and I love, love, love dried sour cherries so I think these little breads are extra charming, and I hope you agree. Of course, you could stick to raisins but I'm telling you, the cherries and caraway seed combination is a winner... I bet even dried apricots could be really good but don't tell that to your soda bread purist friends. Luckily, these single-serving portions also mean you don't need to eat the whole loaf the day you make it; just freeze the little loaves and warm them up in a 350 degree oven whenever the mood strikes. I like mine for breakfast, slathered in good butter, with an egg on the side.


Individual Cherry Raisin Soda Breads
Adapted from Martha Stewart Living, March 2000
Technique for mini-breads adapted from Smitten Kitchen

Makes 8 mini loaves

Note: the mini loaves are tricky only in that it can be difficult to tell when they are done. They should look golden brown on the outside and when you check the temperature it should be 170 degrees in the center. However, given their diminutive size, an accurate reading is not always easy to get. Another way to tell is how the bread feels as you slide the probe in-- if it feels sticky at all, it's still raw in the center. When in doubt, go a few more minutes as nothing is more disappointing than breaking open your bread and finding a doughy middle.

4 cups all-purpose flour
1/4 cup sugar
1 teaspoon salt
2 teaspoons baking powder
2 tablespoons caraway seeds
4 tablespoons cold unsalter butter, cut into 1/2-inch pieces
1 cup golden raisins
1 cup dried sour cherries
1 1/2 scant cups buttermilk
1 large egg
1 teaspoon baking soda
1-2 tablespoons of melted butter, for brushing on the finished loaves

1. Prheat oven to 400 degrees. Line a baking sheet with parchment paper. In a large bowl, whisk together the flour, sugar, salt, baking powder, and caraway seeds until thoroughly mixed.

2. With a pastry cutter or your fingertips, cut the butter into the flour mixture until it resembles a coarse meal. Stir in raisins and cherries, making sure they are distributed evenly.

3. In a small bowl, whisk together buttermilk, egg, and baking soda well. Pour the buttermilk mixture into the mixture all and stir with a fork until all the liquid is absorbed and the mixture begins to hold together. Turn the dough out onto a clean work surface and knead it a few times to make sure the mixture is cohesive. Be sure not to over-knead-- we're not looking for a smooth bread dough, but rather something closer to a biscuit dough.

4. Form the dough into a round. With a pastry blade or a sharp knife, cut the dough into 8 even wedges. Form each wedge into a little ball and place it on the parchment-lined baking sheet. With kitchen shears, carefully cut a small X on the top of each loaf.

5. Transfer to the loaves to the oven and bake, rotating the sheet halfway through, until the loaves are golden brown and cooked all the way through (see note above), 25-30 minutes. Remove the loaves from the oven and brush with melted butter. Serve warm with lots of good butter to go around.

Thursday, March 15, 2012

A sweet ending.


Over the weekend, we had some friends over for dinner. I wanted to keep the meal casual but still just a little more special than an everyday dinner, so chicken with crisp rosemary potatoes came to mind immediately. However, dessert stumped me for weeks.

I know, it sounds really silly to hem and haw over the dessert for a casual get together with good friends. But dessert really puts the exclamation point at the end of a meal, and is certainly my favorite part. I thought, what about a layer cake? No, too fussy; I wanted to keep with the special casual feel (yes, I just made up that term). Cookies? Too casual...

When pound cake came to me, it seemed so obvious. Like I should have thought of it first. It's more special than your everyday sweets, especially with some lemon whipped cream, but it never seems like it's trying too hard. And I love pound cake. It's easy, it's sturdy (no need to make it the day of), and it's power to create a gorgeous domed shape without leaveners seems like magic.

See? Check out that dome! That's just eggs and fluffy butter, my friends. Fantastic.

The only real problem with pound cake recipes is that they generally make 2 loaves, so you should ideally have 2 loaf pans of the same size. However, I do not live in this ideal world so I have a slightly larger than standard pan and a slightly smaller than standard pan. Just make sure you fill your pan 3/4 to 4/5 full to make sure you get that domed shape; if it's not full enough, it won't have that classic shape (but it will still be delicious). If you just want one loaf, you can make cupcakes with the rest; just reduce the cooking time to 20-25 minutes or until a cake tester comes out clean.


Blueberry-Sour Cream Pound Cake
Adapted from Martha Stewart Living, July 2009

Makes 2 loaves

Note: The sugar-sprinkled crust is optional, but I recommend not skipping it. The sugar gives the cake a really pretty top and the crunch provides a nice textural contrast to the cake. But don't skimp on the sugar; really sprinkle 2 tablespoons per cake. It will look like a lot, but if you put on less the crust won't be nearly as crunchy and delicious.

1 pound (3 1/4 cups), plus 2 tablespoons all-purpose flour
1 tablespoon coarse salt, like kosher salt or sea salt
3 sticks softened unsalted butter, plus more for the pans
1/2 cup sour cream
2 cups sugar
1 teaspoon vanilla extract
9 large, room-temperature eggs
2 cups blueberries
4 tablespoons turbinado sugar (aka raw sugar)

1. Preheat the oven to 325 degrees. Butter two 5-by-9-inch loaf pans, or if you're making cupcakes, put pan liners in muffin tins. In a medium bowl, combine 3 1/4 cups flour and salt.

2. With an electric mixer on high, cream butter, sour cream, and sugar until pale and fluffy, about 8 minutes. Scrape down sides of bowl and on medium speed, mix in the vanilla extract.

3. Lightly beat the eggs, and add to mixer bowl in 4 additions. Make sure to mix thoroughly after each and scrape down sides to make sure the eggs are incorporated properly. Reduce the speed to low, and add flour mixture in 4 additions, mixing until just incorporated. Don't over mix-- we want a tender pound cake! Toss the blueberries in the remaining 2 tablespoons flour and fold them into finished batter. Divide batter between pans, tapping on counter to distribute, and smooth the tops. Sprinkle the sanding sugar over each cake (2 tablespoons each).

4. Bake the cakes until a tester inserted into center of each cake comes out clean, about 65 minutes, rotating halfway through the baking time. Let the cakes cool in pans on a wire rack for 30 minutes. To remove from pans, carefully run around the edge of the pan with a knife and gently tip the cake out of the pan. Allow the cakes to cool completely on a wire rack.

If you want to gild the lily (and believe me, you do)...


Lemon Cream

1 cup heavy cream
2 tablespoon confectioners' sugar
2 teaspoons lemon zest

Combine heavy cream, confectioners' sugar, and lemon zest in a medium bowl. Beat until soft peaks form; this means that when you lift the beater the peaks fall over slightly.

Monday, March 12, 2012

Sweet life, indeed!


I don't post a lot about what I read around here, but this was so amazing I had to share. You see, usually I read long, technical articles about employee selection or training methodologies, which I love but it's not what one would call a leisure time activity. However, after seeing a growing pile of books on my nightstand, I vowed to read more as it helps me relax after a long day and inspires me in the days ahead.

One of the most inspirational books I read recently was David Lebovitz's The Sweet Life in Paris. Not only is it a humorous look at a fascinating city through the eyes of an expat, the stories always seem to go back to food. If you love French food or just love a good story, I cannot recommend this book enough.

Did I tell you each chapter ends with no less than one recipe? It's true. Although I have only tried two so far, they are just as wonderful as the rest of the text. This is one of those books that you breeze through so quickly that you're sad to see it go, but luckily it's full of recipes that can live on in your repertoire.

David also offers tours of Paris where he takes visitors around to the markets, bakeries, chocolate shops, etc. A girl can dream!

Sunday, March 11, 2012

Time flies...


I cannot believe how long I have been gone from this blog. I've been so caught up in finishing my thesis (defense date still TBA, but it's out to the committee so there's some relief) and of course attending classes, running other studies, taking care of the puppy, baking for assorted friends' birthdays, etc. that I hadn't realized how much time it had been!

However, I'm pleased to say I'm at the end of Spring Break, which has been relaxing and wonderful, and I have so many baking and cooking adventures to share. The theme for this week has been a bucket list of sorts, for me; since my thesis was submitted I wanted to spend some time attempting culinary feats I had long dreamed of but never attempted, including the croissant you see above. I know, it may seem strange to unwind from a monster project with more monster projects, but in my defense these are much shorter and more delicious. Plus, I've always been one to push myself just beyond what I might be capable of, which is how I ended up making my junior prom dress my second sewn garment ever. This sometimes results in plenty of frustration and tears (over yards of tulle and satin) but the feeling of finishing something I believed I never would is amazing, not to mention plenty of life lessons learned along the way.

Okay, so let's talk croissants. Way back when, I had just begun to dabble in cooking. My mother started subscribing to Martha Stewart Living when I was just finishing up at FIT and I would spend hours poring over her magazines. I dreamed of someday having the skills to whip up the amazing meals detailed in each issue, but not having the know-how, confidence, or opportunity to attempt some of the larger-scale recipes, they remained just that: a dream. One of the spreads that remained with me was and article about homemade croissants. It had never occurred to me before then that these French pastries could be made at home. I longed to make them, but never really mustered up the courage to tackle a recipe that involved 2 days, yeast, and lots of folding. However, last week I decided I was going to go for it and it was glorious.

I'll spare you the nitty-gritty details of making them, as I am at this point certainly a novice (see the from MSL here, and a video here, the wonderful step-by-step instructions appear to only be available in the May 2006 issue).

However, I will share a few things I learned along the way:
  1. Give yourself lots of time. It takes the better part of a day to prepare the dough itself, and then the following day you need to cut and shape the croissants and let them rise for 2 hours. So, unless you're an early bird who does not require food first thing, you won't just roll out of bed and have them on the table for breakfast.
  2. Don't throw away the scraps from the end! Lay some chocolate chips on one end and roll them like a cigar. This will yield bonus chocolate croissants, which are amazingly delicious.
  3. It's difficult to describe the delicious, yeasty, butter fragrance and taste of those freshly baked croissants, but fresh out of the oven they are beyond amazing. However, the recipe makes a whole pile of them and unless you're feeding an army, you will have leftovers. Fear not! The next day, just reheat what you want in a 350 degree oven for 5-8 minutes. If you have even more (as I did) stow them away in the freezer, tightly wrapped, and reheat in a 350 degree oven for 8-10 minutes.
  4. Homemade croissants are well worth your while. The recipe may look intimidating (heck, I was intimidated for... almost 6 years?) but it's really pretty simple once you get into the rhythm. Just take a day when you know you won't be leaving the house and given them a go! At worst, you've lost a few relatively inexpensive ingredients. At best, you have a pile of delicious croissants plus a stash in your freezer.


Tuesday, September 20, 2011

Simple chicken soup for one.

Soup is one of my favorite things about chilly weather. I love eating it but I also love to make it... there's something about stirring a big pot of soup that feels relaxing.

However, sometimes one's schedule does not allow time for simmering a big pot of soup. Or, if you're like us, between work and school schedules you are left to make dinner for one from time to time. These two issues inspired this very simple soup. I hope you'll carve out 20 minutes or so to make yourself a cup for a hearty lunch or a comforting dinner when you only need to cook for one. Since you're just cooking for yourself, tailor it to your tastes; leave out the celery if you hate it, add pasta if you prefer it to rice, throw in some parsley for freshness... the possibilities are endless.

Chicken Soup for One

Note: I used leftover brown rice, but you could also use leftover pasta or throw in a handful of orzo once the vegetables are tender and cook according to the package directions.

Serves 1

1 14.5 oz can of low-sodium chicken broth
1 carrot, diced small
1 small stalk of celery, diced small
1/2 cup cooked rice (or pasta, see above)
1/2 cup cooked chicken (leftover from roast chicken, from a rotisserie chicken, whatever you have)

1. Put the chicken broth in a small saucepan over medium heat and bring to a simmer. Add the carrot and celery and cook until just tender, about 10 minutes.

2. Add the rice and the chicken to the broth mixture and cook until heated through. Season with salt and pepper and serve.

Sunday, September 18, 2011

Call it what you will.

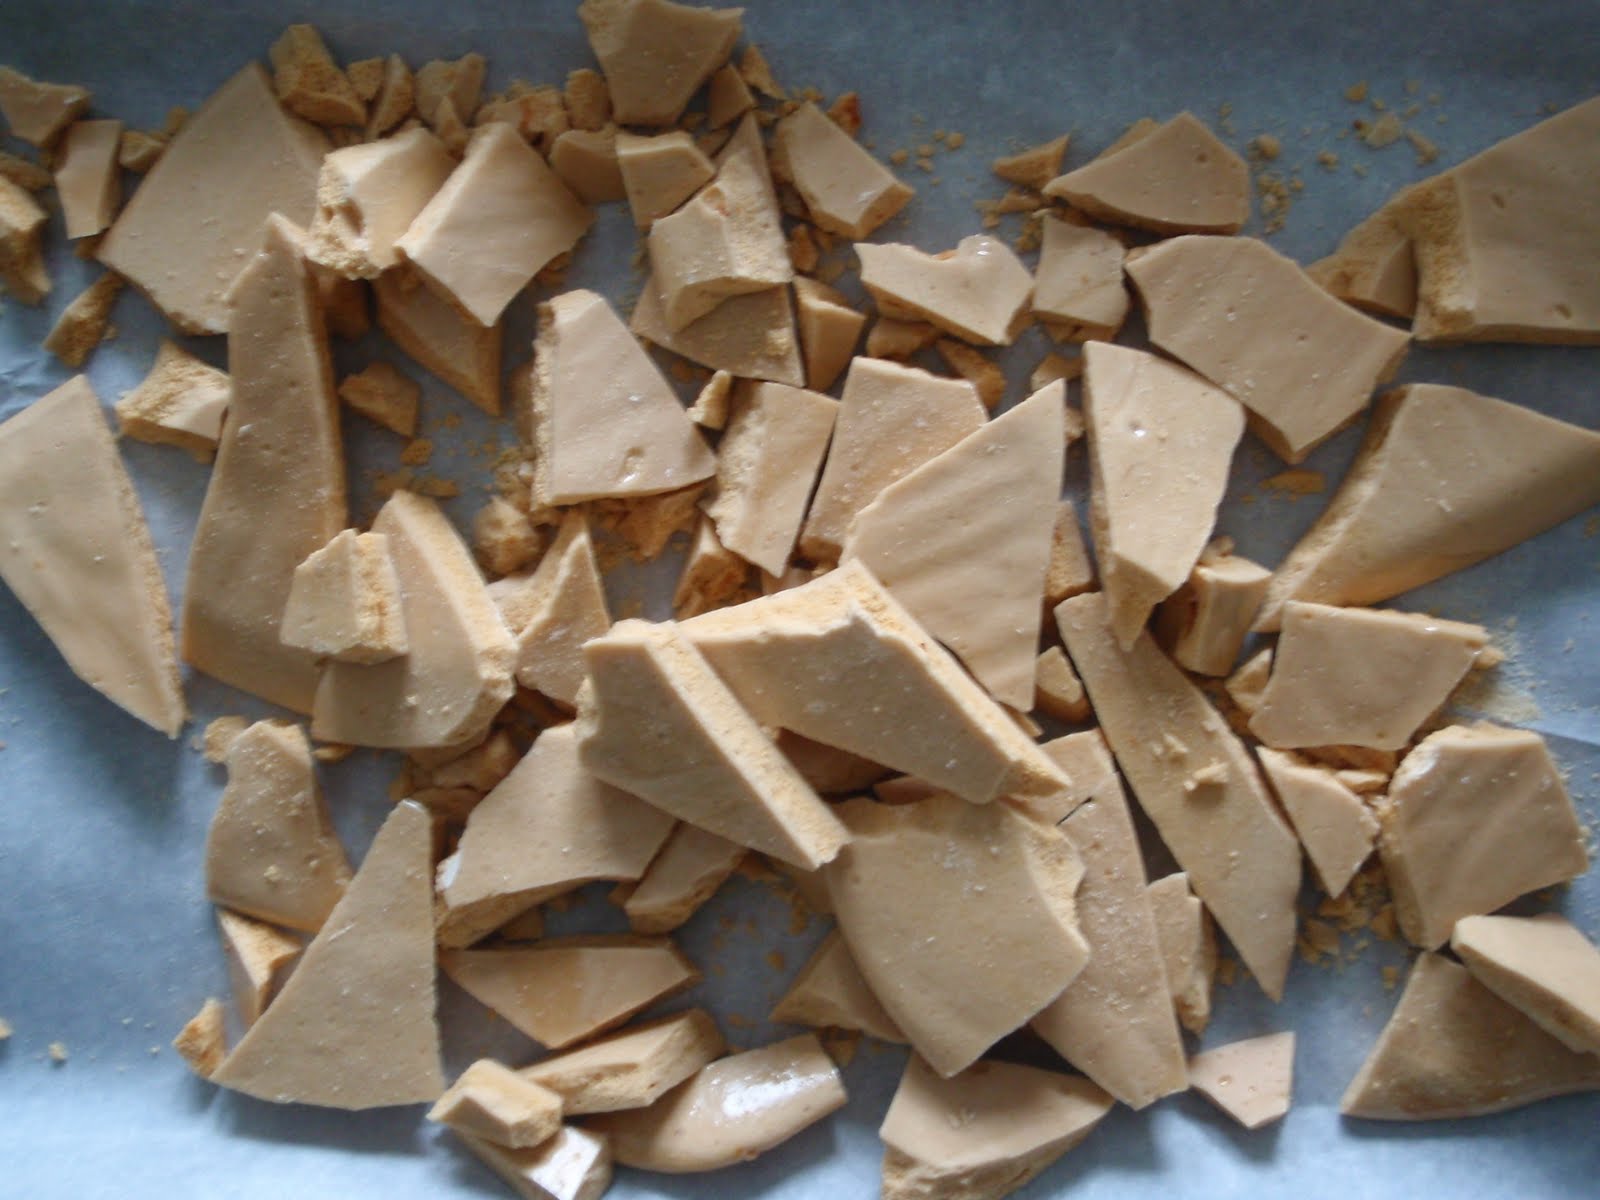
This week, I had a strong desire to make something and candy seemed both frivolous and quick enough to hit the spot. The candy I chose was honeycomb (aka hokey pokey, sea foam, sponge toffee, sea foam, etc.), which has an amazingly light texture but a wonderful burnt sugar flavor. Not too burnt-- we're talking about caramel here.

Honeycomb is not only fun to eat, but fun to make, as well. Simply boil a sugar mixture, whisk in baking soda (which will cause the mixture to puff up considerably), pour onto a pan lined with parchment, and smash into shards once it has cooled. Fantastic.

If you use this recipe as stress relief, I certainly won't judge you.

The reviewers on the Food Network site, where I found this recipe after watching Nigella Lawson prepare this confection on her show, tell me that this stuff is fantastic in ice cream as well as dipped in chocolate. I have yet to try either of these variations, but both sound excellent. Finally, I must confess that the ingredients list I followed came from someone reviewing the recipe, rather than Nigella herself. This included the addition of brown sugar and swapping dark corn syrup for light.

Honeycomb
Adapted from Nigella Lawson

Note: On the website, many people stated their honeycomb never set up, which appears to be due to a couple of factors. First, many warn not to make this candy on a very humid day, as much like meringues the mixture will remain tacky if too much moisture is present. Second, although Nigella eschews a thermometer and gives a basic suggestion to cook the candy for aboutfor 3 minutes we are making candy here and if it doesn't get past the soft crack stage it will never get really hard. In light of this, I heated mine to 290-295 degrees and it set up perfectly.

Makes one standard baking sheet of candy

1/2 cup sugar
1/2 cup light brown sugar
8 tablespoons light corn syrup
1 1/2 teaspoons baking soda

1. Place the sugars and corn syrup in a saucepan over medium heat and stir until combined. Many argue against stirring a sugar mixture as it cooks, but I always stir mine until melted and have never had a problem. Once it's melted and thoroughly combined, stop stirring but continue to cook, swirling gently as needed to evenly distribute the heat.

2. Check the temperature of the mixture often as it boils. You'll see the color change to a deeper golden color but make sure it gets to about 290-295 degrees. Once it reaches that range, remove the pan from the heat. Working quickly, add the baking soda and whisk the mixture until the soda is evenly distributed. Pour the hot sugar mixture onto a baking sheet lined with parchment paper.

3. Allow the sugar mixture to cool completely; mine took about 20 minutes. Once cool, pick the whole thing up and smash it against the baking sheet to break into shards. I tried using my knife to make the breaking more precise but whacking the candy against the baking sheet was an oddly superior method. To store, place the candy in an airtight container.

Monday, September 12, 2011

Birthday brownies.


One of the grad students had a birthday last week. I try to make everyone something for their birthday and, although I want to please their tastes, I also like having the freedom to select something special that I think they'll really enjoy. When I think of this particular student, I think of chocolate, and when I asked if she had preferences beyond that she responded that she likes most everything.

Given the freedom to make anything chocolate I chose brownies because I hadn't made any in a while and I think they are a baked good that can really showcase a fine-quality chocolate. However, this also means that it really shows when you chocolate is iffy, so I really recommend buying the best quality chocolate you can afford.

I love brownies that a fudgy and have nuts but also chocolate chunks in them, but if you'd rather not you can certainly go without the chips or the walnuts. There's something about bitter walnuts, the snap of the chocolate chips, and the soft interior that are a great combination, however. And delicious with coffee, like most baked goods. Speaking of coffee, if you aren't a coffee lover (like my husband) I assure you that you really cannot taste the coffee in the finished product. It just serves to bring out the flavor of the chocolate, like salt does in most everything.


Chocolate brownies
Adapted from Martha Stewart Living, May 1998

Note: The walnuts are completely optional, but in fudgy brownies like this I like a bit of texture. Further, if you make them the day before you'll get a nice contrast between the soft interior, walnuts, and solid chocolate chips. I'll understand if you cannot restrain yourself, however.

Yields 1 9 x 13-inch pan.

1 cup coarsely chopped walnuts, toasted
1 cup unsalted butter (2 sticks), plus more for pan
8 ounces good-quality unsweetened chocolate
5 large eggs
3 1/2 cups sugar
2 teaspoons instant espresso powder
1 tablespoon vanilla extract
1 2/3 cups sifted all-purpose flour (so, sift first, then measure the sifted flour)
1/2 teaspoon salt
1/2 cup semisweet chocolate chips

1. Heat oven to 400 degrees. Generously butter a 9-by-13-inch baking pan and line with parchment, leaving an over hang (you'll use this later to extract the brownies) set aside.

2. In a small, heat-proof bowl, combine the chocolate and the butter. Set the bowl over a pan of simmering water until the chocolate mixture has melted, stirring occasionally. Remove from heat and set aside.

3. Beat the eggs, sugar, and espresso powder in the bowl of an electric mixer fitted with the paddle attachment at high speed for 10 minutes. It will look significantly lighter. Reduce the speed to low, and add the chocolate mixture as well as the vanilla. Beat until combined. Add the flour and salt slowly, beating just until incorporated then fold in chocolate chips and toasted walnuts. Pour the batter into the prepared pan.

4. Bake until edges are dry but you still want the center to be a bit soft. It will look dry on top, but if you inserted a cake tester it would not come out clean. This takes about 35 minutes, but check often to be sure you end up with a fudgie brownie. Transfer the pan to a wire rack to cool. After 30 minutes, lift the sheet of brownies out using the parchment overhang and cut into squares. The original recipe suggested 3-inch squares (12 brownies), which would be deliciously indulgent, but I was taking mine to a party so I cut significantly smaller squares yielding about 30 brownies.

Friday, September 9, 2011

A winning chicken dinner.


I love roasting a chicken for dinner. Yes, it is usually a weekend activity, but unless you have a small army to feed one roast chicken will provide several meals in the coming week. Jared and I will usually save the breasts and then slice some and shred the rest to be used in sandwiches, quesadillas, pasta, salads.... You can really stretch one bird with a little creative thinking.

I've been roasting chickens about as long as I have been cooking, thanks in no small part to Ina Garten's enthusiasm for this simple preparation. In that time, I have tried many recipes and really it is hard to go wrong if you watch the temperature at the end and follow the directions. When I found this recipe over the winter, however, it quickly became my very favorite take on this classic dish.

Crisp skin, juicy chicken, fragrant rosemary, and crispy potatoes. A wonderful and comforting meal to end the week. Throw in a pan of rustic roasted carrots and you've got a complete meal.

The potato preparation is completely novel to me and I love it. You boil the potatoes first, then jostle them about in the pan to "fluff" up their exterior. In the process, it feels very wrong, like they will all break apart leaving you with a mess. But in the oven, all of that potato fluff coating crisps up creating the most delicious potatoes. Save a few for breakfast the next day, if you can, as they are fantastic with a fried egg.


Crisp-Skinned Chicken with Crispy Rosemary Potatoes
Adapted from Martha Stewart Living, January 2011

Serves 4, or 2 with plenty of leftovers

6 russet potatoes, peeled and cut crosswise, 3/4 inch thick
Coarse salt
Extra-virgin olive oil
1/2 teaspoon cornstarch
1 whole chicken, about 4 1/2 pounds (be sure to remove anything from the cavity, like giblets)
1 tablespoon unsalted butter, softened
1 small bunch fresh rosemary

1. Preheat the oven to 450 degrees. Boil the potatoes in salted water until tender, 11 to 13 minutes, checking that a knife slides in and out without resistance. Drain the potatoes and return them to the pot. Shake the potatoes over low heat to dry and fluff their exteriors. Don't shake so hard to break them up, but get a nice even coat of fluff. Remove from heat, coat with oil, and season with salt.


2. Mix together 1 1/2 teaspoons coarse salt and the cornstarch. Pat the chicken dry with paper towels. Rub skin with butter, coating the skin evenly. Sprinkle the salt mixture over the bird evenly and stuff a few sprigs of rosemary into cavity. Pile remaining rosemary in the middle of a rimmed baking sheet covered in parchment.

3. Place chicken on the rosemary, breast side up, tucking the wings under. Truss the legs with kitchen twine. Scatter the potatoes around chicken. Roast for 30 minutes. Remove from oven, and carefully flip the potatoes. Return to the oven, rotating sheet. Roast until chicken juices run clear and an instant-read thermometer inserted into the thickest part of a thigh reaches 165 degrees, about 30 minutes more. Let chicken rest for 10 minutes before carving. If potatoes aren't golden all over, toss them with the rosemary, and return to oven for a few minutes until they are crisp on all sides.

Thursday, September 8, 2011

Daydreams of autumn.

I have been thinking a lot of the season to come and put this treasury together for inspiration. Classes are gearing up, which means lots of busy days. Back with a recipe Friday.

Wednesday, September 7, 2011

A favorite fruit in a favorite salad.

I wanted to share two things with you today: one of my favorite fruits and a super simple salad that highlights this delicious fruit. Growing up, I had seen Asian pears in the market, but never ate one. In fact, it never even occurred to me to buy one for years. That is, until I found this salad last year.

Since then, they have become an absolute favorite of mine. They are crisp and clean like an apple, but sweet and juicy like a pear. I love them out of hand, but there's something about them in this salad... the combination is nearly perfect. The salad is also ridiculously easy to make and handles substitutions really well. The original recipe called for arugula and champagne vinegar, but my husband is not an arugula fan so I used spinach and I don't have champagne vinegar so white wine vinegar had to do. However, I would argue it's just as good. The combination of the celery, Asian pear, and vinaigrette with the greens work so well, like each ingredient was made for the other.

If you're tired of the same old side salad or you've been wanting something fresh and healthy to pair with pasta, chicken, steak, etc., I highly recommend this salad. And if you spot Asian pears in the store this week (especially if they're on sale) pick up a few! Meanwhile, I will be in search of more ways to enjoy this fantastic fruit.


Asian Pear and Celery Salad with Spinach
Adapted from Martha Stewart Living, September 2010

Serves 4

2 teaspoons extra-virgin olive oil
2 teaspoons white wine vinegar vinegar
2 medium stalks celery, thinly sliced on the bias
2 cups baby spinach
1 large Asian pear, cored and thinly sliced
Coarse salt and freshly ground pepper

In a large bowl, whisk together the oil and vinegar. Add the celery, spinach, Asian pear, and season with salt and pepper. Toss to combine and serve.