Tuesday, September 20, 2011

Simple chicken soup for one.

Soup is one of my favorite things about chilly weather. I love eating it but I also love to make it... there's something about stirring a big pot of soup that feels relaxing.

However, sometimes one's schedule does not allow time for simmering a big pot of soup. Or, if you're like us, between work and school schedules you are left to make dinner for one from time to time. These two issues inspired this very simple soup. I hope you'll carve out 20 minutes or so to make yourself a cup for a hearty lunch or a comforting dinner when you only need to cook for one. Since you're just cooking for yourself, tailor it to your tastes; leave out the celery if you hate it, add pasta if you prefer it to rice, throw in some parsley for freshness... the possibilities are endless.

Chicken Soup for One

Note: I used leftover brown rice, but you could also use leftover pasta or throw in a handful of orzo once the vegetables are tender and cook according to the package directions.

Serves 1

1 14.5 oz can of low-sodium chicken broth
1 carrot, diced small
1 small stalk of celery, diced small
1/2 cup cooked rice (or pasta, see above)
1/2 cup cooked chicken (leftover from roast chicken, from a rotisserie chicken, whatever you have)

1. Put the chicken broth in a small saucepan over medium heat and bring to a simmer. Add the carrot and celery and cook until just tender, about 10 minutes.

2. Add the rice and the chicken to the broth mixture and cook until heated through. Season with salt and pepper and serve.

Sunday, September 18, 2011

Call it what you will.

This week, I had a strong desire to make something and candy seemed both frivolous and quick enough to hit the spot. The candy I chose was honeycomb (aka hokey pokey, sea foam, sponge toffee, sea foam, etc.), which has an amazingly light texture but a wonderful burnt sugar flavor. Not too burnt-- we're talking about caramel here.

Honeycomb is not only fun to eat, but fun to make, as well. Simply boil a sugar mixture, whisk in baking soda (which will cause the mixture to puff up considerably), pour onto a pan lined with parchment, and smash into shards once it has cooled. Fantastic.

If you use this recipe as stress relief, I certainly won't judge you.

The reviewers on the Food Network site, where I found this recipe after watching Nigella Lawson prepare this confection on her show, tell me that this stuff is fantastic in ice cream as well as dipped in chocolate. I have yet to try either of these variations, but both sound excellent. Finally, I must confess that the ingredients list I followed came from someone reviewing the recipe, rather than Nigella herself. This included the addition of brown sugar and swapping dark corn syrup for light.

Honeycomb
Adapted from Nigella Lawson

Note: On the website, many people stated their honeycomb never set up, which appears to be due to a couple of factors. First, many warn not to make this candy on a very humid day, as much like meringues the mixture will remain tacky if too much moisture is present. Second, although Nigella eschews a thermometer and gives a basic suggestion to cook the candy for aboutfor 3 minutes we are making candy here and if it doesn't get past the soft crack stage it will never get really hard. In light of this, I heated mine to 290-295 degrees and it set up perfectly.

Makes one standard baking sheet of candy

1/2 cup sugar
1/2 cup light brown sugar
8 tablespoons light corn syrup
1 1/2 teaspoons baking soda

1. Place the sugars and corn syrup in a saucepan over medium heat and stir until combined. Many argue against stirring a sugar mixture as it cooks, but I always stir mine until melted and have never had a problem. Once it's melted and thoroughly combined, stop stirring but continue to cook, swirling gently as needed to evenly distribute the heat.

2. Check the temperature of the mixture often as it boils. You'll see the color change to a deeper golden color but make sure it gets to about 290-295 degrees. Once it reaches that range, remove the pan from the heat. Working quickly, add the baking soda and whisk the mixture until the soda is evenly distributed. Pour the hot sugar mixture onto a baking sheet lined with parchment paper.

3. Allow the sugar mixture to cool completely; mine took about 20 minutes. Once cool, pick the whole thing up and smash it against the baking sheet to break into shards. I tried using my knife to make the breaking more precise but whacking the candy against the baking sheet was an oddly superior method. To store, place the candy in an airtight container.

Monday, September 12, 2011

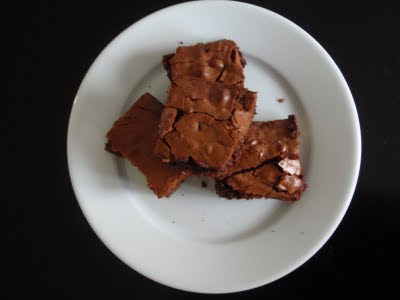
Birthday brownies.


One of the grad students had a birthday last week. I try to make everyone something for their birthday and, although I want to please their tastes, I also like having the freedom to select something special that I think they'll really enjoy. When I think of this particular student, I think of chocolate, and when I asked if she had preferences beyond that she responded that she likes most everything.

Given the freedom to make anything chocolate I chose brownies because I hadn't made any in a while and I think they are a baked good that can really showcase a fine-quality chocolate. However, this also means that it really shows when you chocolate is iffy, so I really recommend buying the best quality chocolate you can afford.

I love brownies that a fudgy and have nuts but also chocolate chunks in them, but if you'd rather not you can certainly go without the chips or the walnuts. There's something about bitter walnuts, the snap of the chocolate chips, and the soft interior that are a great combination, however. And delicious with coffee, like most baked goods. Speaking of coffee, if you aren't a coffee lover (like my husband) I assure you that you really cannot taste the coffee in the finished product. It just serves to bring out the flavor of the chocolate, like salt does in most everything.


Chocolate brownies
Adapted from Martha Stewart Living, May 1998

Note: The walnuts are completely optional, but in fudgy brownies like this I like a bit of texture. Further, if you make them the day before you'll get a nice contrast between the soft interior, walnuts, and solid chocolate chips. I'll understand if you cannot restrain yourself, however.

Yields 1 9 x 13-inch pan.

1 cup coarsely chopped walnuts, toasted
1 cup unsalted butter (2 sticks), plus more for pan
8 ounces good-quality unsweetened chocolate
5 large eggs
3 1/2 cups sugar
2 teaspoons instant espresso powder
1 tablespoon vanilla extract
1 2/3 cups sifted all-purpose flour (so, sift first, then measure the sifted flour)
1/2 teaspoon salt
1/2 cup semisweet chocolate chips

1. Heat oven to 400 degrees. Generously butter a 9-by-13-inch baking pan and line with parchment, leaving an over hang (you'll use this later to extract the brownies) set aside.

2. In a small, heat-proof bowl, combine the chocolate and the butter. Set the bowl over a pan of simmering water until the chocolate mixture has melted, stirring occasionally. Remove from heat and set aside.

3. Beat the eggs, sugar, and espresso powder in the bowl of an electric mixer fitted with the paddle attachment at high speed for 10 minutes. It will look significantly lighter. Reduce the speed to low, and add the chocolate mixture as well as the vanilla. Beat until combined. Add the flour and salt slowly, beating just until incorporated then fold in chocolate chips and toasted walnuts. Pour the batter into the prepared pan.

4. Bake until edges are dry but you still want the center to be a bit soft. It will look dry on top, but if you inserted a cake tester it would not come out clean. This takes about 35 minutes, but check often to be sure you end up with a fudgie brownie. Transfer the pan to a wire rack to cool. After 30 minutes, lift the sheet of brownies out using the parchment overhang and cut into squares. The original recipe suggested 3-inch squares (12 brownies), which would be deliciously indulgent, but I was taking mine to a party so I cut significantly smaller squares yielding about 30 brownies.

Friday, September 9, 2011

A winning chicken dinner.


I love roasting a chicken for dinner. Yes, it is usually a weekend activity, but unless you have a small army to feed one roast chicken will provide several meals in the coming week. Jared and I will usually save the breasts and then slice some and shred the rest to be used in sandwiches, quesadillas, pasta, salads.... You can really stretch one bird with a little creative thinking.

I've been roasting chickens about as long as I have been cooking, thanks in no small part to Ina Garten's enthusiasm for this simple preparation. In that time, I have tried many recipes and really it is hard to go wrong if you watch the temperature at the end and follow the directions. When I found this recipe over the winter, however, it quickly became my very favorite take on this classic dish.

Crisp skin, juicy chicken, fragrant rosemary, and crispy potatoes. A wonderful and comforting meal to end the week. Throw in a pan of rustic roasted carrots and you've got a complete meal.

The potato preparation is completely novel to me and I love it. You boil the potatoes first, then jostle them about in the pan to "fluff" up their exterior. In the process, it feels very wrong, like they will all break apart leaving you with a mess. But in the oven, all of that potato fluff coating crisps up creating the most delicious potatoes. Save a few for breakfast the next day, if you can, as they are fantastic with a fried egg.


Crisp-Skinned Chicken with Crispy Rosemary Potatoes
Adapted from Martha Stewart Living, January 2011

Serves 4, or 2 with plenty of leftovers

6 russet potatoes, peeled and cut crosswise, 3/4 inch thick
Coarse salt
Extra-virgin olive oil
1/2 teaspoon cornstarch
1 whole chicken, about 4 1/2 pounds (be sure to remove anything from the cavity, like giblets)
1 tablespoon unsalted butter, softened
1 small bunch fresh rosemary

1. Preheat the oven to 450 degrees. Boil the potatoes in salted water until tender, 11 to 13 minutes, checking that a knife slides in and out without resistance. Drain the potatoes and return them to the pot. Shake the potatoes over low heat to dry and fluff their exteriors. Don't shake so hard to break them up, but get a nice even coat of fluff. Remove from heat, coat with oil, and season with salt.


2. Mix together 1 1/2 teaspoons coarse salt and the cornstarch. Pat the chicken dry with paper towels. Rub skin with butter, coating the skin evenly. Sprinkle the salt mixture over the bird evenly and stuff a few sprigs of rosemary into cavity. Pile remaining rosemary in the middle of a rimmed baking sheet covered in parchment.

3. Place chicken on the rosemary, breast side up, tucking the wings under. Truss the legs with kitchen twine. Scatter the potatoes around chicken. Roast for 30 minutes. Remove from oven, and carefully flip the potatoes. Return to the oven, rotating sheet. Roast until chicken juices run clear and an instant-read thermometer inserted into the thickest part of a thigh reaches 165 degrees, about 30 minutes more. Let chicken rest for 10 minutes before carving. If potatoes aren't golden all over, toss them with the rosemary, and return to oven for a few minutes until they are crisp on all sides.

Thursday, September 8, 2011

Daydreams of autumn.

I have been thinking a lot of the season to come and put this treasury together for inspiration. Classes are gearing up, which means lots of busy days. Back with a recipe Friday.

Wednesday, September 7, 2011

A favorite fruit in a favorite salad.

I wanted to share two things with you today: one of my favorite fruits and a super simple salad that highlights this delicious fruit. Growing up, I had seen Asian pears in the market, but never ate one. In fact, it never even occurred to me to buy one for years. That is, until I found this salad last year.

Since then, they have become an absolute favorite of mine. They are crisp and clean like an apple, but sweet and juicy like a pear. I love them out of hand, but there's something about them in this salad... the combination is nearly perfect. The salad is also ridiculously easy to make and handles substitutions really well. The original recipe called for arugula and champagne vinegar, but my husband is not an arugula fan so I used spinach and I don't have champagne vinegar so white wine vinegar had to do. However, I would argue it's just as good. The combination of the celery, Asian pear, and vinaigrette with the greens work so well, like each ingredient was made for the other.

If you're tired of the same old side salad or you've been wanting something fresh and healthy to pair with pasta, chicken, steak, etc., I highly recommend this salad. And if you spot Asian pears in the store this week (especially if they're on sale) pick up a few! Meanwhile, I will be in search of more ways to enjoy this fantastic fruit.


Asian Pear and Celery Salad with Spinach
Adapted from Martha Stewart Living, September 2010

Serves 4

2 teaspoons extra-virgin olive oil
2 teaspoons white wine vinegar vinegar
2 medium stalks celery, thinly sliced on the bias
2 cups baby spinach
1 large Asian pear, cored and thinly sliced
Coarse salt and freshly ground pepper

In a large bowl, whisk together the oil and vinegar. Add the celery, spinach, Asian pear, and season with salt and pepper. Toss to combine and serve.

Tuesday, September 6, 2011

Rustic roasted carrots with honey.

Like many home cooks, this time of year is a little tough for me. I love fall, and know its bright leaves and cooler temperatures are around the corner. The change in the weather will bring my favorites of fall including apples, apple cider, pears, root vegetables, and winter squash and with them lots of wonderful home cooked meals. On the other hand, here in the South it still feels hot like summer, but the piles of fresh corn and heaps of stone fruit no longer greet me at the market each week.

I wish autumn would hurry up and get here, but I know that once winter comes and the holidays are over I will be wanting a great tomato and some watermelon. Although I shouldn't rush the transition, just like every other year at this time I have already bookmarked recipes to try and I even roasted a chicken with crispy potatoes this week, which is madness when I consider that it feels like August outside.

Never the less, I really enjoyed the chicken and I knew when I was planning the meal that I needed a vegetable that would feel just as cozy. If you've never roasted carrots, you must as they taste unlike any other carrot preparation. Much like a toasted marshmallow, they have an almost smokey taste from the caramelized sugars but they are not mushy as steamed carrots can be (ick). These carrots also have a drizzle of honey, which really brings out the sweetness. It sounds odd, but don't skip this step as the honey takes these from a good dish to a great one. You might wait until fall to make these (and avoid the hot oven in the heat, very smart) but I think you'll find them to be a perfect accompaniment to so many things that you, too, will make them again and again.


Rustic Roasted Carrots with Honey
Adapted from Everyday Food, May 2008

Note: I don't measure when I make these anymore. For two of us, I use one bunch of carrots, plenty of salt and pepper, oil to coat, and a good drizzle of honey at the end. This recipe easily adjusts up and down in scale as you can't really mess it up as long as you let the carrots caramelize and season them well.

Serves 4

1 1/2 lbs carrots, cut on the diagonal into 2-inch lengths. Halve pieces lengthwise if they're thick.
1 tablespoon oil
1-1 1/2 tablespoons mild honey

1. Preheat the oven to 450. Toss the carrots with oil on a baking sheet and season well with coarse salt and freshly ground black pepper. Roast the carrots for 30-40 minutes, tossing once, until tender.

2. Remove the carrots from the oven and drizzle with honey. Allow them to sit for a minute or two to allow the honey to blend with the carrots and serve.

Monday, September 5, 2011

Scuppernongs.


I found these at the grocery store yesterday in the grape section and, having no idea what they were, I had to have them. They look a bit like gooseberries, but with brown speckles, and they are very large (about the size of a big gumball). The fruit was labeled "Bronze Muscadine Grape" but the shelf label read "Scuppernong." That name was too fantastic to resist.

Wikipedia tells me Muscadine grapes are native to the South and that scuppernongs in particular are the state fruit of North Carolina. Further, the oldest cultivated grape vine is a scuppernong vine on Roanoke Island which is 400 years old! I cannot believe I had never heard of them before, but it must have something to do with growing up in Central Pennsylvania.


Speaking of which, growing up, concord grapes were a big deal in the summer. My mother used to grow them and when we didn't have our own we waited until they showed up in the produce section for our fix. Scuppernongs remind me very much of the concord grape, with its seeds, tough skin, and sour/sweet interior. I've been eating them out of hand, but it seems that a popular use for these grapes is jam. Unfortunately, I don't have enough for this application; however, I could even see them on a salad, in a sandwich, or on a pizza (don't get me started on grapes on pizza... weirdly good).

If you have any experience with these grapes, I would love to hear about it. And, if you see them nestled among the usual red and green grapes at your grocery store I highly recommend giving them a try.

Sunday, September 4, 2011

A weekly ritual.


Most every week for the last 3 years, Jared and I have celebrated the end of the week with a tradition we call Pizza Friday. This started when we were looking for a way to unwind after a long workweek when we would make big pizzas on baking sheets and watch movies while we ate. However, the tradition has changed over time and thanks to some friends moving conveniently close Pizza Friday is currently a little party that closes the week, often with a movie or a game to add to the fun. Thanks to my parents' gift of a pizza stone and peel, I can make four small pizzas to please our assorted palates in rapid succession. The one constant in this ritual, other than the sauce, is this dough recipe.

Once I found it, I have not used any others. I consider it occasionally, but this dough is so simple to make and just works so amazingly well that I always come back to it. You can make it the night before, allowing it to rise in the fridge before letting it come to room temperature and stretching it into rounds. If you really need to plan ahead, you can freeze it after dividing it up where it keeps for weeks and you can just thaw it out overnight and have pizza the next day.


Jared loves strombolis, and let me tell you this dough makes a great stromboli. Roll each portion out, fill with your favorite things (I like cheese, sausage, sun-dried tomatoes, and browned onions) then brush the edge with egg wash, fold the dough over in half, and roll the edges under. Bake at 500 degrees for 15-25 minutes (check often, it depends on your fillings) or until golden brown and enjoy warm.

I share all of this with you because I hope that even if you've never made yeasted dough you'll give this one a try and experiment yourself. If you make this dough part of your repertoire I promise you'll find it simple to make, a myriad of uses for it, and you may even start each weekend with a casual get together of your own.


Pizza Dough
Adapted from Smitten Kitchen

Makes 4 small pizzas or strombolis

12 tablespoons warm water, although you may need a tablespoon more depending on the weather...
4 tablespoons white wine
1 1/2 teaspoons active dry yeast
1 teaspoon honey
2 teaspoons kosher salt
2 tablespoons olive oil, plus more for the bowl
3 cups flour, plus more for the work surface
Cornmeal

1. Whisk the wine, water and yeast in a large bowl until the yeast dissolves. Add honey, salt and olive oil (to keep the honey from sticking to the spoon, I put a little olive oil in it) and stir until combined. Add the flour and stir it until combined. It will look like a shaggy mess; start off with a spoon, then work it with your fingers until the dough comes together. If it's really dry and isn't cohesive, you can add some more water a tablespoon at a time, but this is generally not necessary. On a lightly floured surface, knead the dough for a few minutes until it looks smoother.

2. Wash out your large bowl and lightly oil it. Put the dough in the bowl, lightly coat it with oil and cover with plastic wrap. Allow the dough to rise for about 2 hours, or until doubled. To test it, press two clean fingers into the dough. If it springs back, the dough needs to rise longer. If the deep impression is left, your dough is ready.

3. Preheat your oven to its highest temperature, which is 500 on my oven. If you have a pizza stone, place it in the oven to preheat. If you do not have a pizza stone, place a baking sheet in the oven to preheat.

4. Once the dough has risen, turn it out onto a floured surface and gently deflate the dough with your fingers, gently pressing ton distribute the air. Cut the dough into four equal pieces and place under the upended bowl to rest, for 20-30 minutes. In the meantime, get all of your toppings ready. The pizza you see above is fig jam and prosciutto with mozzarella and goat cheese but there are many great combinations. I love a pizza margarita (sauce, mozzarella, and basil) but our friend Alicia is fond of a white pizza with goat cheese, mozzarella, bacon, and red pepper flakes. Just trust me that one the dough is made into rounds you want to assemble quickly to avoid having the dough stick to your peel.

5. On a lightly floured surface or with lightly floured hands, roll or stretch the dough into rounds. I usually start with my rolling pans before stretching it with my hands, but whatever works best for you is fine. Just be sure to make the dough pretty thin to achieve a nice, crisp crust. Place the crust onto a cornmeal-sprinkled peel or baking sheet and add your toppings. Slide the pizza onto the preheated stone or baking sheet in the oven. I can fit two pizzas side by side on my stone, but go one by one if you need to. No one wants crowded pizzas. Bake for 7-10 minutes but start checking early as they can cook really fast. Slice and serve hot.


Friday, September 2, 2011

Friday. Finally.

I was going to tell you all about Pizza Friday today but after a long day of interviewing research assistants, gearing up for the semester, and then getting together with friends, I'm feeling like Pepper so it will need to wait for another day. Hope your weekend brings you rest and relaxation! New post tomorrow...

Thursday, September 1, 2011

More bananas, please.


I'm having a banana moment right now. It hit me a few weeks ago, when I wanted to bake something banana. I probably hadn't eaten a banana for several months, but since then I have eaten them out of hand, sliced them up into my oatmeal, and hoarded Jared's leftovers for banana baking.

Last night, I found myself with two perfectly ripe bananas and went searching for a bananas recipe that only included ingredients I had on-hand and didn't require immediate consumption (sorry, bananas foster and banana-stuffed french toast...). This banana cake by Lucinda Scala Quinn fit the bill perfectly.


Since the recipe required melting butter, I went ahead and browned it since bananas are a natural match for that caramelized flavor. To do so, just melt the butter over medium heat and let it foam away. When the foaming subsides, it will start to brown but watch it carefully so it doesn't burn; a nice pale golden brown is perfect. Pour off the liquid, leaving the solids behind, and you're ready to use it in place of regular melted butter in almost any recipe. The caramel flavor is further ramped up by a brown sugar streusel topping. I need not tell you that this cake is delicious for breakfast, a rustic dessert, or even an afternoon snack.

Banana Cake with Browned Butter
Adapted from Lucinda Scala Quinn

Note: I had a few changes from the original. First, Lucinda used an electric mixer to finish combining the wet and the dry ingredients but I avoid using my mixer for any muffin method recipe so I mixed it all by hand. Your dishwasher (in my case, me) will thank you. Also, I didn't have buttermilk so I mixed 1/4 cup milk and 1/4 cup of plain yogurt and it worked just as well. Finally, you can of course use regular melted butter in place of the browned butter, but my humble opinion is that the couple of extra minutes are totally worth it.

Serves 8

Cake
2 cups all-purpose flour
1 1/2 teaspoons baking powder
1 teaspoon baking soda
3/4 teaspoon salt
3/4 cup sugar
1/2 cup butter (1 stick), melted and browned (see instructions above)
1/2 cup buttermilk (or see above for substitute)
2 eggs
1 teaspoon vanilla
2 ripe bananas, mashed (about 1 cup)

Streusel
1/4 cup all-purpose flour
1/4 cup dark brown sugar
1/4 cup butter (1/2 stick), cut into pieces

1. Preheat the oven to 300 degrees and lightly grease a 9" x 13" pan with butter. In a large bowl, whisk together the flour, baking powder, baking soda, salt, and sugar. Stir in the melted butter until the mixture is moistened. Stir in 1/4 cup of the buttermilk until combined.

2. In a separate bowl, whisk together the other 1/4 cup of buttermilk with the eggs and vanilla until combined. Add the egg mixture to the flour mixture and mix just until combined. Add the bananas and mix thoroughly (but don't over-mix... remember, it's like a muffin batter). Pour the batter into the prepared pan.

3. For the streusel, place the butter, flour, and brown sugar in a bowl and rub with your fingers until you have pea-sized crumbs. Sprinkle the streusel evenly over the batter. Bake for 35-40 minutes or until a cake tester inserted in the center comes out clean.

Wednesday, August 31, 2011

The little things.


When I found out last week that our little community was directly in the path of hurricane Irene, one of my first thoughts was, "But the morning glories have just started to come into their own! How could I ever protect their delicate vines from this storm?" A Google search revealed, of course, that there really is no way to protect a garden from a hurricane. You just put away anything not nailed down and hope for the best. So I took some pictures just before we left and hoped that I could enjoy a few more blossoms this year, however tattered they may be.

Obviously, we were relieved to hear that the storm had weakened and that our home would likely survive just fine while we were away. We finally returned and no one was happier to be home than Pepper. However, I was thrilled to discover that, although we had a few lost branches and some damage to our fence, my morning glories looked better than ever.

You wouldn't know it from their reputation, but these little plants are really vigorous. As I said before, they survived our wedding/honeymoon absence during a heatwave but they have really grown beyond my expectations. The seed packet said 4-5 feet, so I was hoping the moonflower's 7-9 foot vines would reach the top of the shed to keep it from looking sparse. However, these morning glories grow straight up the shed and if the roof had more nooks and crannies I think they would grow right up and over the other side.

Whenever I feel like my to-do list is a mile long and I can't possibly accomplish everything I need to, I remember my little morning glories and count how many buds will burst open with big, beautiful flowers to greet me tomorrow. It's just one little thing to look forward to every day and I'm so thankful they survived the storm. No sign of moonflower blooms just yet, but I will patiently wait.

What little things bring you joy each day?

Thursday, August 25, 2011

Lemon-scented blueberry cornmeal bliss.


It's no secret that my husband loves cornbread. So when I found myself with all of the ingredients to make my favorite blueberry pancakes for breakfast one Saturday I decided to switch things up and make cornmeal blueberry pancakes.

I have apparently lived a very sheltered life, having mostly eaten buttermilk pancakes and a few multi-grain pancakes in my life but not recalling any cornmeal pancakes. The cornmeal adds a nice, subtle crunch and a mild sweetness. These pancakes also have a touch of lemon zest which leaves them smelling (and tasting) positively divine. I couldn't resist adding syrup to mine, but Jared ate several plain and they really are good enough to eat by themselves as they are anything but your garden variety one-note pancakes.


If you really wanted to be fancy, you could use wild blueberries (not something I see in VA Beach... ever) or have a little bacon on the side. That would be an amazing Saturday morning.

Lemon-Scented Blueberry Cornmeal Pancakes
Adapted from Cook's Illustrated

Note: I used my griddle here because, frankly, using the griddle for pancakes is much more pleasant than using a big skillet on my tiny burners. However, you can just as easily use a skillet on medium heat. Also, although I normally cut recipes in half, pancakes freeze beautifully so whether you're cooking for 1 or a family, go ahead and make the whole batch. Then just freeze any leftovers in a single layer on a baking sheet covered in parchment. Once they're solid (about 2 hours) store them in a zip lock bag. Reheat in the toaster, an oven set to 350, or even the microwave.

Serves 4

1 cup unbleached all-purpose flour
1 1/2 cups yellow cornmeal
2 tablespoons sugar
2 teaspoons baking powder
1/2 teaspoon baking soda
1/2 teaspoon table salt
2 cups buttermilk
2 teaspoons finely grated lemon zest
1 large egg
3 tablespoons unsalted butter, melted and cooled
Vegetable oil
1 cup fresh or frozen blueberries (if using frozen, rinse and dry the berries to keep their color from bleeding into your pancakes)

1. Preheat a griddle to 325 degrees and the oven to 200 degrees. Whisk together the flour, cornmeal, sugar, baking powder, baking soda, and salt in a medium bowl. In a small bowl, whisk together the buttermilk, zest, egg, and melted butter until combined.

2. Make a well in the center of the dry ingredients in the bowl. Pour the buttermilk mixture into the well and mix gently until combined. You want to make sure you don't have any large pockets of the flour mixture, but don't mix out all of the lumps as over mixing will result in tough pancakes.

3. Brush the griddle with a thin but even layer of vegetable oil. Using a 1/4 cup, pour the batter onto the griddle in 4 places (or as many will comfortably fit on your griddle). Sprinkle 1 tablespoon of berries onto each pancake and allow the pancakes to cook until large bubbles appear on the center of the pancakes and have set (i.e. are not actively boiling). Mine took 3-4 minutes. Flip and cook the other side until golden brown, about 2 minutes more. Repeat, placing cooked pancakes on a baking sheet in a single layer to stay warm until ready to serve. Monitor the pancakes carefully and don't be afraid to adjust the griddle temperature if they seem to be browning too quickly or too slowly.


Tuesday, August 23, 2011

A perfect pre-dinner nibble.


I was introduced to this recipe through Smitten Kitchen, a very favorite blog of mine. This flatbread is a wonderful combination of flavors: fresh thyme, nutty cheese, coarse sea salt, and sweet honey on a warm, crispy cracker. Better still, it's ridiculously simple to make.

Deb jokingly suggested to have this flatbread with your evening cheese course. But I realized that Jared and I often both return from a long day at campus ravenous and enjoy a little something before dinner. Like while waiting for the grill to heat up.


So you can cook grilled chicken paillards with sour orange sauce.


Standing in your yard, with cool August grass under your sandals.


While your dog gives you this weird look when you try to take her picture.

Sure, you'll have bit too much for two, but you can heat up the leftovers the next day in a hot oven. But just give them a couple of minutes or they get a bit too toasty. Not that I know from experience.

Honey, Thyme, and Sea Salt Flatbreads
Adapted from Smitten Kitchen

Note: I used Fleur de Sel sea salt, but any coarse salt will do. Also, Deb suggests a myriad of cheese suggestions and I went with Parmigiano Reggiano because that's the hard cheese I always have but you can certainly experiment here. However, the cheese is a really important flavor, so don't use that stuff in the green can. Not that I need to tell you that.

Makes 4 big flatbreads that can be broken down however you wish.

1 3/4 cups all-purpose flour
1 teaspoon baking powder
3/4 teaspoon table salt
1/2 cup water
1/3 cup olive oil
3/4 cup finely grated Parmigiano Reggiano cheese
1/2 honey
1 tablespoon fresh thyme
Coarse salt (sea salt such as Maldon or Fleur de Sel preferred)

1. Place you pizza stone (or a baking sheet) on the middle oven rack and preheat the oven to 450 degrees.

2. Whisk together the flour, baking powder, and salt in a medium bowl. Make a well in the center and pour in the water and the oil gradually, mixing with a spoon or a spatula until the dough comes together. It will look like a shaggy mess, but it will be fine. Knead the dough gently for a minute or two; it should feel quite oily.

3. With a pastry blade, divide the dough into 4 pieces. Roll out each piece on a sheet of parchment paper into an oblong shape about 12"x6". It should be pretty thin after you've rolled it out. The dough is a bit sticky but work through it. Your patience will be rewarded.

4. Slide both the dough and parchment paper onto the preheated baking sheet or stone, and bake about 6 minutes, until just golden. I could fit 2 at a time in my oven, which makes it go a bit quicker, but one at a time is just fine. Quickly sprinkle 1/4 of the cheese onto each piece. Bake an additional 3 to 4 minutes, until the edges and thin spots are just browned. Remove the flatbreads from the oven and drizzle each with honey, sprinkle with sea salt and garnish with thyme leaves. This is really a taste issue for how much of each you may like but my own advice is to not skimp on the honey and the salt. Cut each flatbread into 4 sections (or more, if you like...) width-wise with a sharp knife. Repeat with remaining dough. Serve warm.

Monday, August 22, 2011

A bread that needs no introduction.


Banana bread is a classic. We have all had it and, except for those banana haters out there (hi, Mom!), we love its sweet aroma and moist crumb. I should probably leave it at that and just give you the recipe, but I won't because, as my friends and family know, I'm a bit verbose.

I have been yearning for something banana for some time. However, every time I went to the store, bananas completely slipped my mind and I found myself daydreaming of bananas again mid-week. So, when Jared bought bananas I watched and waited, hoping they would become too ripe for him to eat. Unfortunately for him but luckily for me, they ripened quite quickly and I ended up with 3 very ripe bananas.

With bananas in hand (or in the fridge, as it were) I set about making banana bread. Since my family doesn't have a tried-and-true recipe for banana bread, I often use a different one every time. This particular bread comes from Beard on Bread by James Beard that I purchased some time ago. A few things intrigued me about it:

1. For the book's previous owner, this was clearly a beloved recipe with notes in the margin about swapping in whole wheat flour and the flavor of the cake.

2. James Beard suggests almonds instead of the classic walnuts. I obliged and it's new and great. Also, Jared is not a walnut fan, so anyone else who does not love their bitterness might give this a go.

3. Mr. Beard suggests using this bread for sandwiches, calling it "extraordinarily good" for this purpose. I must try this while there's still some bread left, although I wish he had suggested a suitable sandwich.


Banana Nut Bread
Adapted from Beard on Bread by James Beard

Note: I sprinkled raw sugar on top because I cannot help myself, but it would be delicious without. Also, you can swap the almonds for any other nut. Finally, the recommended pan is 12 x 4 1/2 x 2 1/2 but I don't have a pan of that size so I used a standard loaf pan.

Makes 1 loaf

1/4 cup (1/2 stick) unsalted butter
1/2 cup sugar
1/2 cup honey
2 large eggs
3 very ripe bananas, mashed
1 1/2 cups all purpose flour
1/2 teaspoon baking soda
1/2 teaspoon table salt
1/2 cup sliced almonds

1.Preheat the oven to 350 degrees and butter a standard loaf pan. Cream the butter with a hand mixer until light. Add the sugar and honey and beat the mixture until creamy and light. One at a time, add the eggs beating incorporating each thoroughly. Mix in the bananas until fully incorporated. Sift together the flour, baking soda, and salt. Add the dry mixture to the banana mixture, beating just until combined. Fold in the nuts.

2. Pour the batter into the butter loaf pan. If you like, sprinkle the top with a few tablespoons of turbinado sugar. Bake the loaf for 1 hour to 1 hour and 15 minutes, checking for doneness near the end. When a cake tester comes out clean, it's finished. Cool in the pan for 10 minutes before turning out on a rack to cool completely.


Wednesday, August 17, 2011

Leftovers for breakfast?(!)


Anyone who knows me well knows that when it comes to breakfast I'm a bit, well, picky. I don't eat pizza for breakfast and I certainly don't eat cold pizza (ever, actually). I only eat "breakfast" for breakfast, if that makes sense. I never go without breakfast, but if I wake up on vacation past normal breakfast time, so help me we will find a place serving breakfast. It's crazy and I totally acknowledge that. Luckily, I married a man who is willing to drive long distances to find me breakfast.

As a result of my breakfast needs, I never eat leftovers (that aren't a baked good) for breakfast. Wait, scratch that. Almost never. Polenta and an egg, I will eat. I love polenta. It's hot, creamy, inexpensive, easy to prepare, and endlessly versatile. However, my favorite thing might be frying up polenta left over from last night's dinner with an egg.


If you've never fried polenta, you must try it. I will tell you that I had many polenta frying accidents (sticking to the pan, soggy instead of crispy, etc.) until I learned that you need to lightly dredge it in flour and then fry it in really hot oil without turning until you see a golden crust. Follow these rules and you cannot go wrong. Of course, you could serve this with dinner but have it for breakfast and it is quick enough for a weekday but it will feel special like a weekend.


Fried Polenta

Note: Use whatever oil you like (vegetable, olive, etc.) and you can even do some oil with some butter. However, because butter has a low smoke point, you shouldn't use all butter as it will burn before the polenta crisps.

Firm polenta (see recipe below)
1/3 cup all purpose flour
3-5 tablespoons of oil

1. Cut the polenta into shapes (triangles, sticks, etc.). More surface area means more crispy deliciousness, so just avoid big blocks. Put the flour on a shallow plate and lightly dredge each polenta piece in flour, shaking off excess.

2. In a large frying pan (preferably nonstick or cast-iron) heat the oil over medium-high heat. The amount of oil varies, depending on your pan, so just pour enough in to cover the bottom of the pan. When the oil is hot (you can test by dropping in a small piece of polenta or some flour... if it sizzles, it's ready) place a few pieces of the polenta in the pan. Be sure to not crowd the pan; if you're making breakfast for more than 2 people, work in batches. Don't flip the polenta until it's browned; you'll see it get golden on the edges when it's time. Really be patient as this can take 3-5 minutes. Repeat until all sides are golden and crisp. Drain on a paper towel, and serve hot with a fried egg.


Polenta

Note: I make this polenta with chicken broth, but you can certainly use water or milk, if you prefer. Also, you can add a little finely grated Parmesan at the end or herbs. Polenta is like a blank canvas that you can color however you wish.

Serves 2 with enough left over for breakfast, or 4 to serve as a side

3/4 cup yellow cornmeal (I like Bob's Red Mill, but just make sure it isn't cornmeal for cornbread, with leaveners and the like added)
2 cups low sodium chicken stock
3/4 teaspoon salt
Pinch freshly ground pepper
1 tablespoon unsalted butter

1. In a large saucepan, combine 2 cups of water, the stock, salt and pepper. Bring it to a boil over high heat. Slowly add the cornmeal in a steady stream, whisking constantly to ensure a smooth polenta with no lumps.

2. Simmer the mixture on medium low, whisking frequently until thickened. It should look a bit like hot cereal, which takes about 15 minutes. Remove from heat and whisk in the butter. Serve immediately, reserving half for fried polenta.

If you want to make fried polenta, while the polenta is still warm pour it into a square or rectangular container (such as a loaf pan or a baking pan). Cover and refrigerate until firm, which takes about 2 hours but you can keep in in the fridge for several days.


Tuesday, August 16, 2011

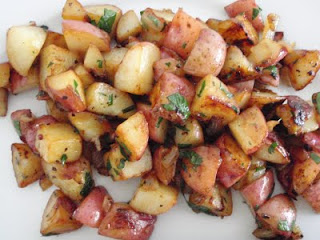
Perfect breakfast potatoes.

Jared and I absolutely love home fries and hash browns. However, ordering them out can be very hit and miss. When they are right, they're crispy on the outside, creamy on the inside and perfectly seasoned. But all too often we find ourselves with a plate full of undercooked, soggy potatoes with no seasoning whatsoever (is a little salt too much to ask?).

Why do we order them, time and time again? Clearly, we are tuber masochists. Every time I make them myself I think, "I should do this more often! These are the potatoes I seek every time I go out for brunch!" The trouble is, I generally just make these when I have leftover potatoes. Do as I say, not as I do, and buy some potatoes for this purpose. You will not regret it.

You might even invite over a small, furry dining companion who loves potatoes and chicken sausage. Or, you know, friends who are people that will eat with utensils and not steal your food off of the table.

Breakfast Potatoes
Adapted from Barefoot Contessa Family Style by Ina Garten

Notes: As I said before, I usually make this with leftover potatoes when we get a 2 lb bag of those baby red skinned or Yukon Gold for roasted potatoes with dinner. However, you can definitely use full sized boiling potatoes, like Ina Calls for in this recipe. I never peel the potatoes but you can if you like. Also, although I had parsley and scallions on hand, you can definitely makes these potatoes without and they will still be delicious. Finally, I cut in in half-ish, but feel free to scale it up. Just be sure to use a pan large enough that the potatoes will brown, not steam.

Serves 2

3 tablespoons unsalted butter
1 lb boiling potatoes, 1/2 inch diced
1 chopped yellow onion
1 teaspoon kosher salt
1/2 teaspoon freshly ground black pepper
1 tablespoon chopped flat-leaf parsley
1 tablespoon minced scallions

1. Melt the butter in a large skillet over medium-low heat. Add the potatoes, onions, salt, and pepper and cook for about 20 minutes, turning every 5 minutes. The real key here is you want to potatoes to brown and the onions to caramelize, so it you start turning at 5 minutes and they aren't browned, just wait. Your patience will be rewarded.

2. Once the potatoes are browned and cooked through (you can test with the tip of the knife, it should slide in and out easily), turn off the heat. Add parsley and scallions and stir. Serve the potatoes hot with sausage or a fried egg.

If you have leftovers, which is unlikely, these potatoes are fantastic in an omelet or frittata.


Sunday, August 14, 2011

A decidedly grown-up slush.


Last week, watermelons were buy 1 get 1 free, a wonderful side effect of the height of the season. But as much as I love watermelons, I wanted to try something new since I was staring at a stockpile of pink, juicy sweetness. I went recipe searching and this one really appealed to me with its simple ingredients and incredibly easy technique. It makes me feel really lazy but in the dredges of August, easy techniques really appeal to me.
Anyway, this granita does not disappoint. If you haven't had granita before, it's like a refined slushie but still rustic and no straw is required. All you need is watermelon, sugar, and a little lime juice. Although Jared didn't care for the lime, I felt its sour note actually made the melon taste more like itself.

This recipe is so easy, I thought it might be fun to show you through pictures in the hope that if you find yourself with a pile of watermelon on your hands you won't hesitate to make a batch!

Watermelon Granita
Adapted from Bon Appetit, June 2011
6 servings

4 cups cubed seedless watermelon
1/2 cup sugar
1 tablespoon freshly squeezed lime juice

1. Puree all of the ingredients in a blender until smooth.

2. Pour the mixture into a metal 9x9 pan and freeze for 60 minutes. The metal makes it freeze faster, but you could certainly use any container and just increase the time. Be careful, however: if you wait too long you'll end up with a giant ice cube which you will need to thaw and re-freeze.

3. Stir the mixture, breaking up any larger frozen pieces with the back of a fork.

4. Freeze until firm, about 2 hours, then flake with a fork. You can cover and store the granita in the freezer for a few days, but it will slowly become less and less flaky. Serve with a small wedge of fresh watermelon and escape the heat (if only for a moment)!


Thursday, August 11, 2011

A new spin on the caprese.

I love everything about the caprese: the cheese, the fresh tomatoes, the basil... in summer this salad is definitely a favorite of mine. However, even I like a change of pace every once in a while. Sometimes you can't get really fresh mozzarella or you need a side that packs a little more punch. This tomato salad fits the bill perfectly.

Switching the mozzarella out for goat cheese (which I always have on hand) and the basil leaves for a basil vinaigrette keeps it interesting without straying too far from those familiar flavors. The vinaigrette is really strong but when you drizzle it on the tomatoes it mellows beautifully. Even better, it's a great use for that basil growing like crazy in the garden and it will keep in the fridge for a week to dress salads, fish, or grilled chicken.


Tomato and goat cheese salad with basil vinaigrette
Adapted from Everyday Food, July/August 2008

Serves 2, with basil vinaigrette to spare

1/2 cup packed fresh basil leaves
2 tablespoons olive oil
2 tablespoons white wine vinegar
2 ounces goat cheese
2 medium tomatoes, cored and cut into 1/4 thick slices

1. Place basil, oil, vinegar, and 1 tablespoon of water into a blender. Blend until smooth, 2-3 minutes. Season with coarse salt and pepper, to taste.

2. Slice goat cheese using dental floss. This is a genius tip from EDF that makes beautiful, even slices instead of crumbles. On two plates, alternate tomato slices and goat cheese, dividing evenly. Season the salad with coarse salt and pepper, drizzle with vinaigrette, and serve.